
Choosing a solar panel for charging 12V battery systems comes down to three practical checks: battery capacity, daily energy use, and how quickly the battery needs to recharge. A small panel can maintain a parked vehicle or lightly used battery, but it will recharge very slowly after regular use. For most 12V setups, a 50W to 150W solar panel is a sensible starting range, with larger panels needed for bigger batteries, daily power draw, or reliable year-round charging.
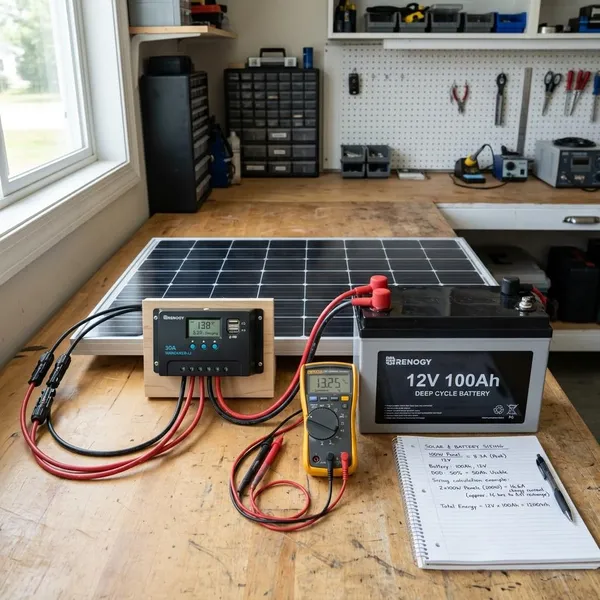
What Size Solar Panel Do You Need for a 12V Battery?
The useful size depends less on the battery voltage and more on the battery's amp-hour rating and daily use. A 12V 20Ah battery used for a gate opener is a very different job from a 12V 100Ah battery running lights, fans, and a fridge at a campsite.
Small panels maintain battery power
Use a small panel when the battery mostly sits full and only needs help against self-discharge or a tiny standby load. A 10W or 20W panel can make sense for a parked car, motorcycle, tractor, gate battery, or seasonal boat battery.
It is not the right choice if the battery is being drained deeply. After running lights, pumps, or electronics, a small maintainer may need days of good sun to recover the battery. For unattended use, choose a regulated maintainer or add a basic charge controller so the battery is not slowly overcharged in long sunny periods.
Medium panels support regular charging
A medium panel is usually the sweet spot for light but real use. A 50W to 150W panel can support LED lights, phone charging, Wi-Fi backup, small fans, or a modest camping setup when the battery is not heavily cycled every day.
- Choose closer to 50W for occasional top-ups or small batteries.
- Choose around 100W for a common, flexible 12V setup.
- Choose 150W if you want more margin without building a large system.
For a summer-only shed or weekend camping battery, this range often feels sensible. For daily use in winter, it may still be too small unless the loads are very light.
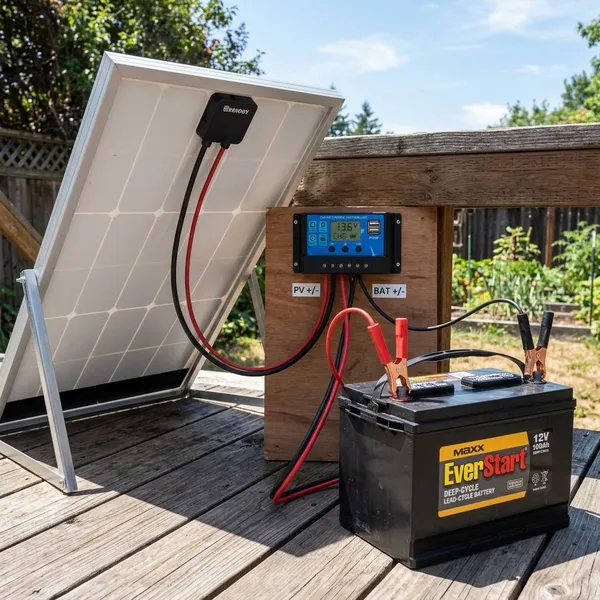
How Does a Solar Panel Charge a 12V Battery?
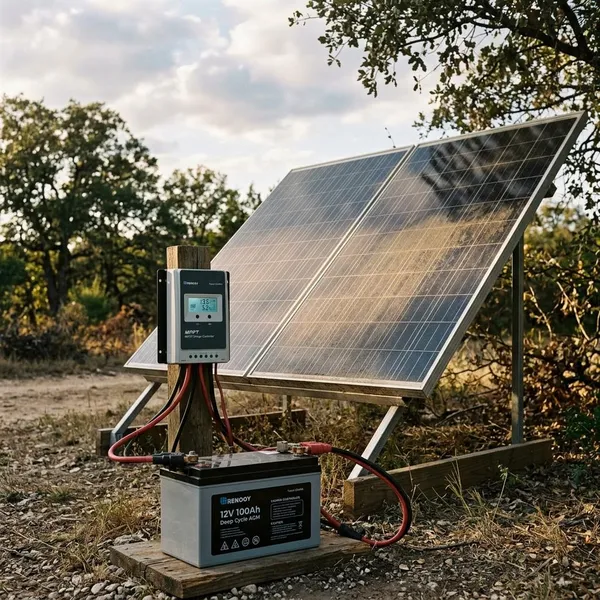
A solar charging setup has a simple flow: the panel makes DC electricity, the charge controller regulates it, and the battery stores it. The controller is the part that keeps the process controlled instead of letting the panel push unregulated voltage into the battery.
Solar panels turn sunlight into electricity
The panel's job is to convert sunlight into DC power. Its wattage rating is measured under ideal test conditions, so a 100W panel will not produce 100W all day in normal outdoor use.
Angle, season, cloud, dirt, and shade all change the result. A panel mounted flat on a shed roof may be fine for summer top-ups, while the same panel may struggle in winter when the sun is lower and the usable solar window is shorter.
Charge controllers regulate power flow
A charge controller sits between the panel and battery and manages charging voltage and current. For most practical 12V systems, it is not optional; it helps prevent overcharging and allows the battery to charge in the correct stages.
- PWM controllers are simple and affordable for small systems.
- MPPT controllers are often better for larger panels, limited sunlight, or higher-voltage panel setups.
- Battery settings matter because AGM, gel, flooded lead-acid, and lithium batteries need different charging profiles.
Batteries store energy for later use
The battery is what lets you use solar power after the sun is gone. Capacity is usually listed in amp-hours, but usable energy depends on battery chemistry, battery age, and how deeply you discharge it.
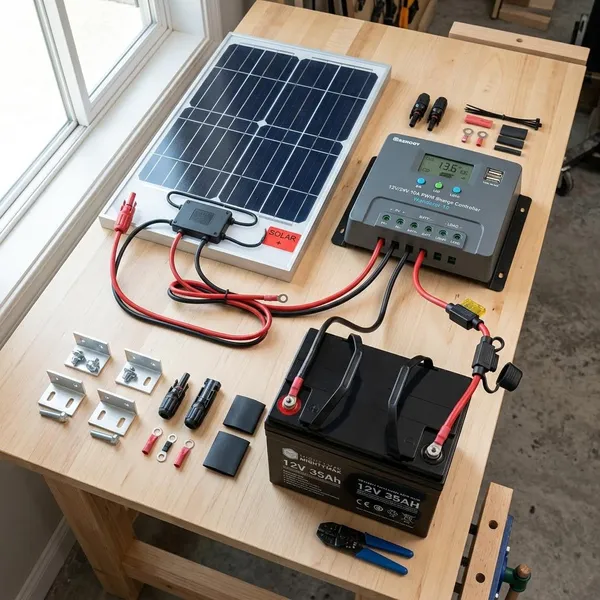
What Parts Do You Need for a 12V Solar Charging System?
A basic 12V solar charging system needs a solar panel, charge controller, 12V battery, suitable cables, and fuse protection. An inverter is only needed if you want to run AC appliances; it is not required just to charge the battery.
Solar panels provide charging power
Choose the panel around the job you expect it to do. A rigid panel is usually better for a roof, shed, boat, or permanent mount, while a folding portable panel is useful when you want to move it into the best sun at a campsite.
Charge controllers control battery charging
Match the controller to the panel's maximum voltage and current, then set it for the battery type. If the controller is too small, it may limit charging or fail; if the profile is wrong, the battery may be undercharged or stressed.
Batteries store solar energy
Pick battery capacity based on the load, not just the panel size. A 20Ah battery may be enough for small backup electronics, while 50Ah to 100Ah is more common for camping, marine, RV, and small off-grid use.
- Occasional backup: a smaller lead-acid or AGM battery may be enough.
- Daily cycling: consider more capacity and a stronger charging setup.
- Weight-sensitive use: lithium is often easier to carry and use deeply.
Cables and fuses protect the system
Do not treat cables and fuses as afterthoughts. Thin or very long cable runs create voltage drop, which slows charging and wastes panel output. Loose or corroded connections can also heat up and cause unreliable charging.
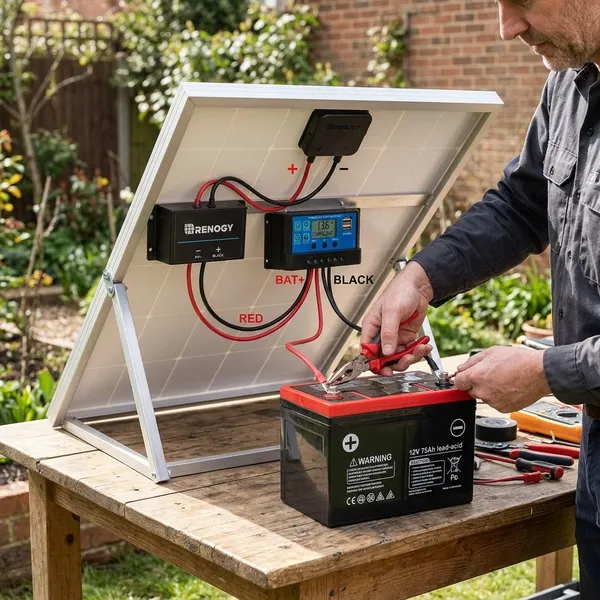
How to Connect a Solar Panel to a 12V Battery
The safe layout is usually solar panel to charge controller to battery, not panel straight to battery. Direct connection is only reasonable for very small regulated maintainers designed for that purpose.
Before wiring, cover the panel or keep it disconnected, check polarity markings, and confirm the controller supports your battery chemistry. Most mistakes in small systems happen at this stage: reversed polarity, missing fuse, loose terminals, or connecting the controller in the wrong order.
Connect components in the correct order
Most controllers should be connected to the battery first, then to the solar panel. This lets the controller detect system voltage before solar input arrives.
After the battery connection is stable, connect the panel input and then any load terminals if the controller provides them. If your controller manual gives a different order, follow the manual for that model.
Follow a simple wiring layout
A simple wiring order is easiest to check and troubleshoot:
- Mount or place the panel in clear sun.
- Connect controller to battery with correct polarity.
- Add a fuse near the battery positive connection.
- Connect the panel to the controller.
- Secure cables away from water, sharp edges, and pulling.
If the system is portable, make the wiring tidy enough that it can be set up the same way every time. If it is permanent, protect the cable route from abrasion, weather, and accidental movement.
Check the system before use
Before relying on the system, check that the controller shows solar input and a sensible battery voltage in direct sun. If the battery is already nearly full, the controller may show float or maintenance rather than strong charging.
- No solar input: check shade, polarity, connectors, and fuses.
- Weak charging: look for dirty panels, long thin cables, or poor panel angle.
- Hot terminals: stop and inspect the connection before continued use.
A full-day check is more useful than a five-minute noon test. Morning shade or afternoon shade can make a system look fine briefly while still failing to replace enough energy over the day.
What Affects 12V Solar Charging Performance?
Panel wattage matters, but real charging speed is shaped by sunlight, shade, temperature, wiring losses, controller efficiency, and battery condition. If a setup charges slower than expected, start with sun exposure and wiring before assuming the panel is faulty.
Sunlight changes daily charging output
Daily output rises and falls with the season, weather, and panel angle. Peak sun hours are more useful than daylight hours because they estimate the amount of strong, usable sunlight a panel receives.
A setup that works easily for summer camping may not be enough for year-round shed power. If the battery must stay reliable in winter, size for the weaker season or reduce the loads during low-sun months.
Shade and temperature reduce power
Shade is often the fastest way to ruin solar performance. A small shadow from a branch, roof edge, antenna, or cable can cut output much more than expected.
Heat also lowers panel efficiency, even on bright days. For a fixed installation, clear midday sun matters most, but leaving some airflow behind the panel can help avoid unnecessary heat buildup.
System losses increase charging time
Real systems lose energy through cables, connectors, the controller, and the battery charging process itself. Lead-acid batteries also charge more slowly near full, so the last part of charging can take longer than simple math suggests.
If your estimate says a 100W panel is barely enough, treat that as a warning. Moving to 150W or 200W, shortening cable runs, or using a better controller can make the system feel much more dependable in everyday use.
Conclusion
The best setup is the one that matches your real use, not the one that only works on a perfect sunny day. Use a small panel for maintenance, a medium panel for light regular charging, and a larger panel when the battery is cycled often or must recover quickly. Add the right controller, fuse protection, and clean wiring from the start, because those small details often decide whether a 12V solar charger feels reliable or frustrating.