
A solar panel to charge camper battery can keep lights, fans, phones, fridges, and small appliances running off-grid, but only when the panel, charge controller, battery, and wiring are matched correctly. The right setup starts with how much power you use each day, then works backward to choose a solar panel size and components that can safely recharge your camper battery in real camping conditions.
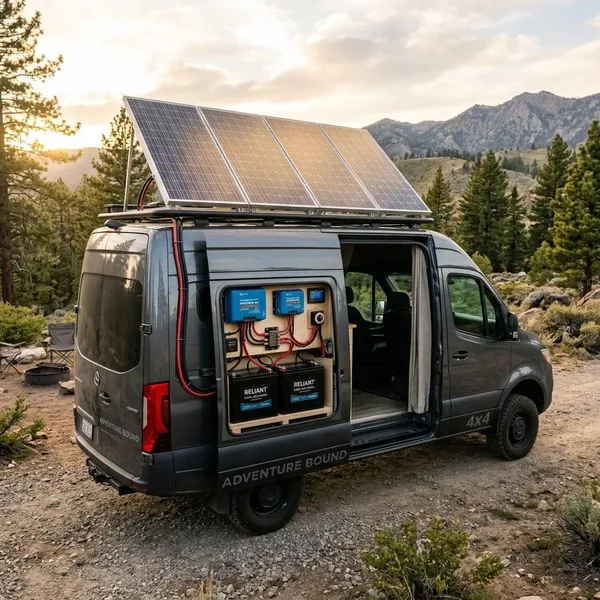
How Does Solar Charging Work in a Camper?
Camper solar charging is simple at a high level: the panel makes electricity, the charge controller regulates it, and the battery stores it for later. The practical part is making sure each step matches the way you camp.
If you only charge phones and run a few LED lights, the system can stay small. If you rely on a fridge, fan, water pump, laptop, or inverter, the battery and solar array need more margin because cloudy weather and shade reduce charging quickly.
Generate electricity from solar panels
Solar panels produce DC electricity when sunlight hits the cells. Their rated wattage is measured in ideal test conditions, so a 100W or 200W panel will often produce less in normal use because of heat, flat roof mounting, clouds, dirt, or partial shade.
This is where camping style matters. A roof panel on a camper parked under trees may perform poorly all afternoon, while a portable panel placed in full sun can do better even with lower rated wattage.
Control charging with a solar controller
The charge controller sits between the solar panel and the battery. It prevents uncontrolled voltage from reaching the battery and manages the charging stages so the battery is charged more safely.
- Bulk charging: pushes the most current when the battery is low.
- Absorption charging: slows charging as the battery nears full.
- Float or maintenance charging: keeps many lead-acid batteries topped up without overcharging.
Lithium batteries may use different charging behavior, so the controller must support the battery type you install.
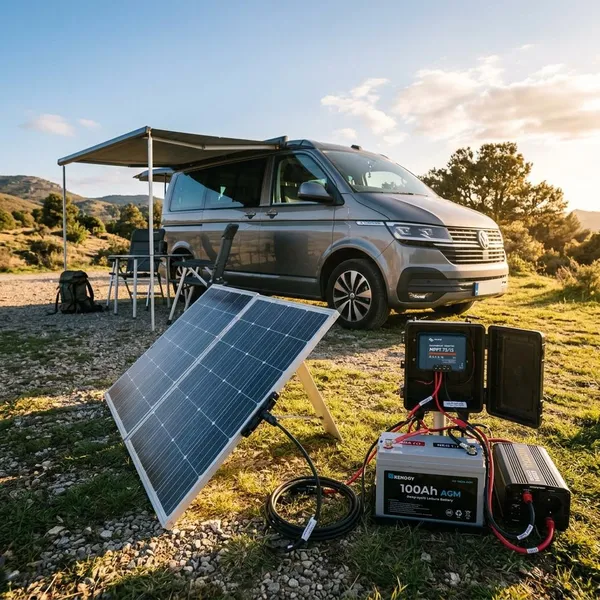
What Do You Need to Charge a Camper Battery With Solar?
You need more than a panel. A reliable camper solar setup includes a solar panel, a compatible charge controller, the battery, correctly sized cable, connectors, mounting hardware, and fuse or breaker protection.
The first thing to check is compatibility, not price. The controller must handle the panel input, the battery must match the controller settings, and the wiring must be sized for the current and cable length.
Choose the right solar panel
Choose the panel based on daily use and available sun. A 50W panel may maintain a battery in storage, but it is usually too small for regular off-grid camping. A 100W panel can work for light weekends; 200W to 300W is more realistic if you run a small fridge or fan every day.
Panel type also changes how the setup feels:
- Rigid panels: durable and common for roof mounting.
- Portable folding panels: easy to move into sun, useful at shaded campsites.
- Flexible panels: lightweight, but often run hotter and may have a shorter service life.
Add a compatible charge controller
The controller must be rated for the solar panel voltage and current, with a safe margin. It also needs charging settings for your battery chemistry, especially if you use AGM, gel, flooded lead-acid, or LiFePO4.
If you may add more panels later, do not size the controller right at the limit. A little headroom can prevent replacing the controller during your first upgrade.
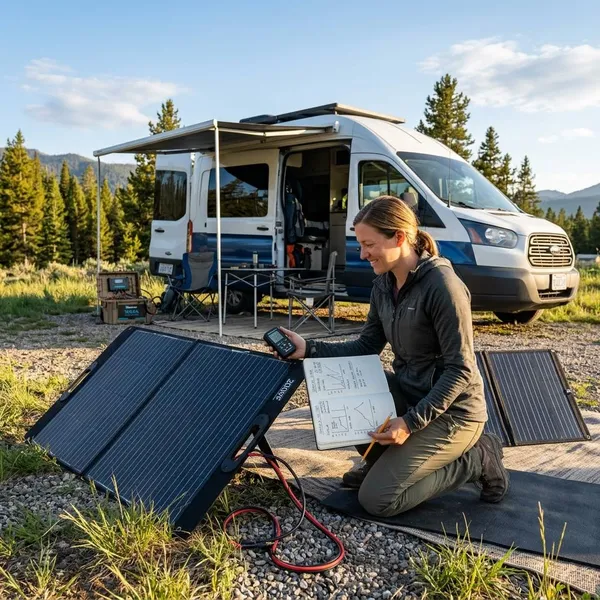
How Do You Choose the Right Solar Panel Size?
Pick the solar panel size by estimating how much energy you use in a normal day, then adding margin for imperfect sun. Battery voltage alone does not tell you enough; watt-hours give a clearer picture.
For a light weekend camper, a modest panel may be enough. For summer camping with a fridge running all day, the same panel can feel undersized very quickly, especially when the camper sits in partial shade.
Calculate daily power use
List the devices you run from the battery, estimate how many hours each one runs, and multiply watts by hours. Add the results to get your daily watt-hour target.
| Typical load | Simple estimate | Why it matters |
|---|---|---|
| LED light | 10W × 4 hours = 40Wh | Small, but easy to count |
| Vent fan | 20W × 5 hours = 100Wh | Higher in warm weather |
| 12V fridge | Varies by duty cycle | Often the main daily load |
| Phone or small device charging | 20Wh to 40Wh | Minor alone, adds up with several devices |
If your rough total is already 500Wh to 700Wh per day, a tiny maintenance panel is not the right tool for the job.
Match panel wattage to battery size
A larger battery gives you more storage, but it does not create energy. The solar array still has to replace what you use. A big battery with too little solar may last longer at first, then recover too slowly after a cloudy day or heavy night of use.
- 50W: better for maintenance than real daily camping loads.
- 100W: useful for light weekends, lights, phones, and small loads.
- 200W to 300W: a more comfortable range for many small campers with a fridge.
- 400W or more: worth considering for frequent off-grid use or larger battery banks.
Estimate charging time
Charging time depends on panel wattage, sun hours, battery size, battery state of charge, controller efficiency, and whether you are using power while charging. Treat any estimate as a planning guide, not a guarantee.
As a rough real-world expectation, a 100W panel may need most of a sunny day or longer to recover a partly depleted 12V 100Ah battery. With 200W, recovery becomes more practical for normal camping. With 300W to 400W, you get better margin for clouds, poor angle, and ongoing loads.
Which Charge Controller and Battery Should You Choose?
The controller and battery should be chosen together. A good panel can still charge badly if the controller has the wrong profile or the battery cannot accept the charging behavior you expect.
For occasional trips, a basic setup may be enough. For longer off-grid stays, the extra efficiency of MPPT and the usable capacity of LiFePO4 can make the system feel much less fragile.
Choose between PWM and MPPT controllers
PWM controllers are cheaper and can work well in small systems where the panel voltage is close to the battery voltage. They are a reasonable choice for simple, budget-focused setups.
MPPT controllers usually harvest more usable power, especially with higher-voltage panels, larger arrays, cold weather, or limited roof space. If you plan to camp often without hookups, MPPT is usually the better long-term choice even though it costs more.
Match the controller to your battery type
Battery chemistry matters. Flooded lead-acid, AGM, gel, and LiFePO4 batteries do not all want the same charging voltage or charging pattern.
- Flooded lead-acid: lower upfront cost, but needs more care and ventilation considerations.
- AGM: sealed and convenient, but still dislikes repeated deep discharge.
- Gel: needs suitable charging settings to avoid damage.
- LiFePO4: lighter with more usable capacity, but requires compatible charging settings.
Before buying a controller, check that it has a preset or programmable mode for the exact battery type you plan to use.
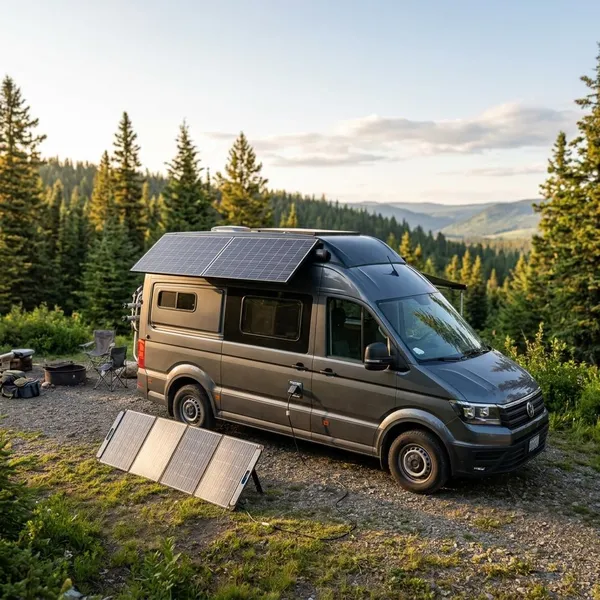
Portable vs Roof-Mounted Solar Panels for Campers
Portable and roof-mounted panels both work, but they solve different problems. Portable panels give you control over sun exposure. Roof panels give you automatic charging without setup.
If you camp in wooded sites for several days, portable solar can be surprisingly useful. If you move every day or stop for quick overnights, roof-mounted solar is often easier because it works whenever the camper is in daylight.
Choose portable panels for flexibility
Portable panels make sense when you want to park the camper in shade but place the panel in sun. They are also useful if you rent, avoid drilling into the roof, or want to test solar before committing to a permanent installation.
The trade-off is handling. You need to unpack the panel, aim it, secure it from wind, and think about theft if you leave camp.
Choose roof panels for convenience
Roof-mounted panels are best when you want the system to work without daily effort. They charge during travel days, lunch stops, and short stays where a portable panel might never leave storage.
The downside is fixed position. A roof panel cannot be moved away from shade, and installation requires secure mounting, cable routing, and weatherproof roof entry points.
Compare cost and charging performance
The cheapest option is not always the best value. Portable panels may cost more per watt, but installation is simple. Roof panels can be better for larger systems, but roof work adds time, hardware, and possible installation risk.
- Choose portable if you often stay in one place and chase better sun.
- Choose roof-mounted if you travel frequently and want automatic charging.
- Choose a hybrid setup if roof solar covers daily basics but you want a portable boost in shade.
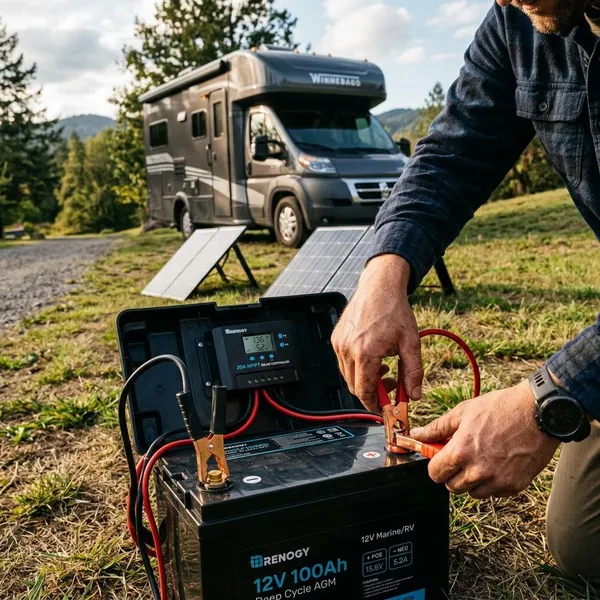
How Do You Connect a Solar Panel to a Camper Battery?
In most camper solar systems, the charge controller connects to the battery first, and the solar panel connects to the controller second. That order lets the controller detect the battery voltage before it receives solar input.
Read the controller manual before wiring anything. Terminal labels, fuse recommendations, and startup order can vary, and the manufacturer's instructions should take priority over general advice.
Connect the system in the right order
- Turn off loads and cover the panel if possible, so the installation is easier to control.
- Connect the controller to the battery with correct polarity and the recommended fuse near the battery.
- Confirm the controller powers up and detects the battery voltage.
- Connect the solar panel to the controller only after the battery side is connected.
- Uncover the panel and check that the controller shows solar input.
Protect the system with proper wiring
Use wiring that can handle the expected current and the length of the cable run. This is especially important for portable panels because the cable may be longer than a roof-mounted setup.
Secure the cables so they cannot rub against sharp edges or loosen from road vibration. A fuse or breaker near the battery is usually one of the most important protection points because the battery can deliver high current during a short circuit.
Test charging before regular use
Test the setup at home before depending on it at a campsite. In good sunlight, the controller should show solar input and an appropriate charging stage. A multimeter can also confirm whether battery voltage rises while charging.
If charging looks weak, check the simple things first: shade across one part of the panel, dirty glass, loose terminals, reversed polarity, incorrect battery type setting, or a long undersized cable run.
Conclusion
Choosing the right solar panel to charge a camper battery depends on your power needs, battery type, and camping style. A reliable setup requires matching the solar panel, charge controller, battery, and wiring correctly. Smaller systems work for basic devices, while larger setups with proper battery capacity are better for off-grid camping with higher energy needs.